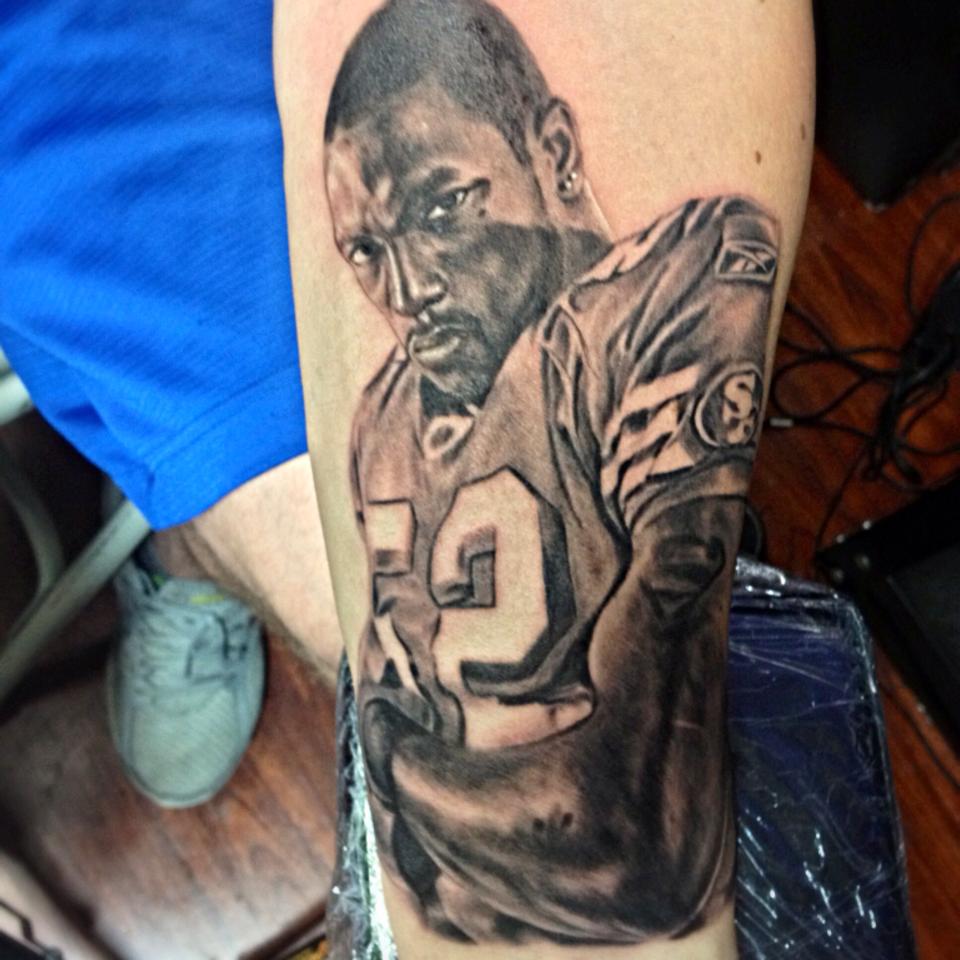
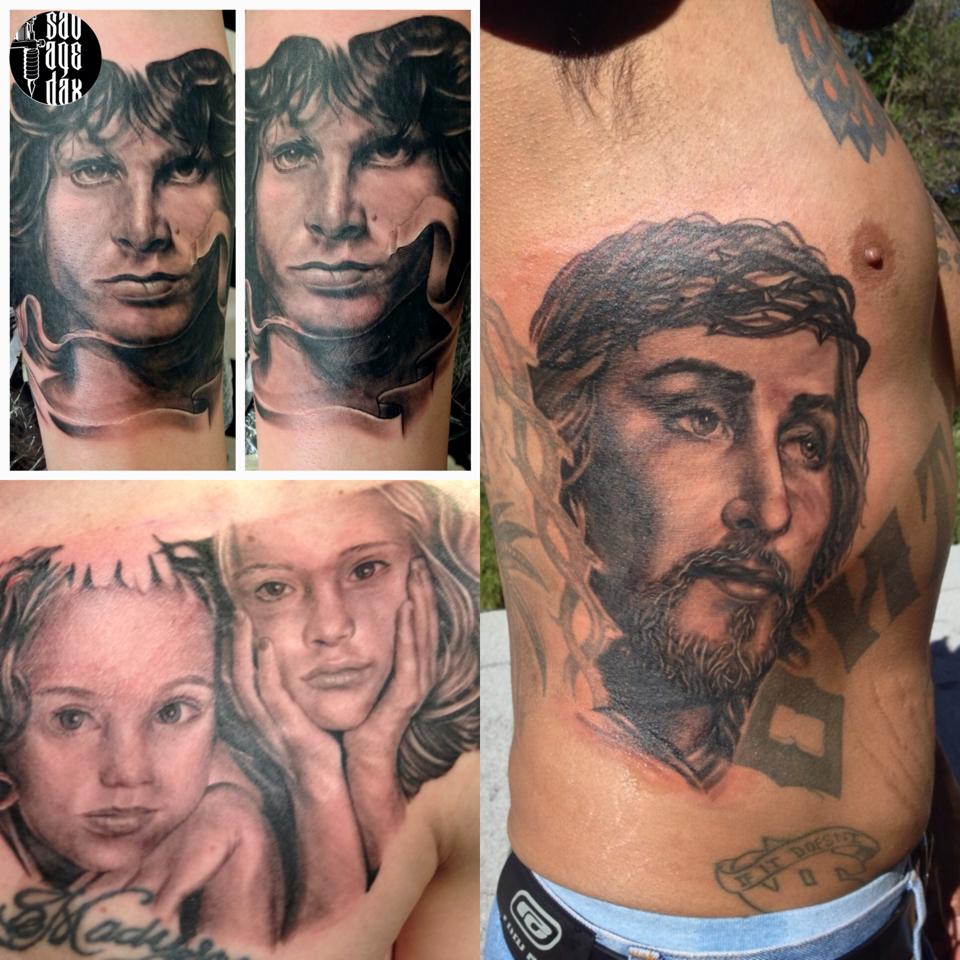
,

How to Stop Doubting Yourself and Become Confident with Tattooing

As we grow into our tattooing skills and purpose in Life, we become more attuned to our vitality and strength.
We also become more aware of the ways that we limit ourselves.
 
We come to realize that our thoughts, more so than our circumstances, sabotage our freedom and success… when it comes to improving our tattoo skills.
 
We are the ones who allow our insecurities and fears to grow into the tidal waves of worry that wash our dreams away…
 
We are the ones who constantly delay our own progress, quitting just as the hour demands courageous action…
 
None of us want to look in the mirror and realize that the person looking back is the cause of such frustration.
We would rather smile at the reflection and be proud of its courage…
 
We want to see ourselves as free and motivated masters of our own lives…
 
Yet a quick glance into our own tired eyes often reveals a knowledge that we are standing in our own way.
 
Too often we find ourselves muttering at the mirror, “why can’t you get your act together and go for what you truly desire?
 
Why aren’t you taking more risks, drawing more, tattooing more challenging pieces, being more consistent, connecting better with people?”
 
These are difficult days when we realize our internal demons are beating us. Those days must come to an end. Now.
 stencil.blog-post-image (3)
Greatness in the tattoo industry belongs to those who have mastered their internal world. Those Who Breathe in their Courage and Exhale their Fears…
We are all plagued by doubt, but the great nevertheless find faith and begin.
 
We all feel like delaying action, but the Great march on…
 
We all want to avoid vulnerability or act superior over others from time to time, but the great consistently demonstrate openness, humility, and love..
 
These few are not lucky; they are simply more intentional and more practiced at defeating their internal demons…
 
This is why they have so much vitality, motivation, and confidence– and their Artwork is Magnificent! 
 
Let us choose to make that our aim, and once and for all root out that which holds us back in our tattooing..
 
We deserve to be free from all those stirrings within us that compromise our magnificence.
 
For this Let us Declare: We Shall defeat our demons.
 
—-The Enemy Within:
 
Let us give our challenger a name. As it stands in the way of our own will to advance our tattooing, we shall name it Defiance…
 
Defiance is that monster that stirs deep in our gut whenever we want to take a risk..
 
When it squirms we feel anxiety in our stomach, that awful sense that we are not enough or things might turn out terribly.
 
It’s movements make us worry ourselves sick. It makes us feel so weak and distrustful that we stop taking action or connecting with others,
or persuades us not to invest into a course that we know will improve our tattooing.
 
It is the organism within that acts from our lowest impulses for self-protection.
 
No one escapes life without fighting this beast.. 
-The artist who never starts his or her tattoo shop because of constant terror is in its grasp.
 
-The poor artist who starts and stops action all his life, never learning realism and never gaining real momentum toward his or her goals, is being wrecked by it…
 
-The egotistical tattoo artist who sees his fellow tattooers as idiots or competitors is being seduced by it.
 
Anytime we set a higher ambition for ourselves, this nasty beast gnaws at us from within, tearing at our confidence and consuming us from the inside out, leaving us fearful and gutless…
 
Where did defiance come from and how did it get its power?
 
It grew from the seeds of fear fed to us by the tyrants of the world: the cautioners who taught us to favor doubt over faith, the apathetic followers who showed us how to favor delay over action…
 
The negative thoughts they planted in our heads fed the beast within, and now it grows in power whenever we hear ourselves think,
“I’m not good enough.
I better stop what I love because I’m scared. I’m not worthy of trust and respect and neither are others.”
 
The bullies of the industry may have given us these thoughts. But it was our own failure to discontinue them that birthed the internal struggle we face today.
 
With our own weakness we give Defiance its power.
 
As we become more aware, we learn to sense this beast as separate from our own nature…
We can detect when it stirs within us, noticing a sudden wave of tension and stress in our body.
 
We can hear it’s shines and roars rise from our gut into fearful thoughts:
“I am not sure!”
“The timing may not be right”
 
We cannot feed this fearful internal voice of defiance anymore..

Defiance can roar all it wants, but we can choose to ignore it as we might a pesky yapping dog.
 
We can calm ourselves by taking control of our own thoughts and actions and investing into the right material…
 
With practice we can overcome that internal demon once and for all. Should we succeed, we shall reach or full personal power.
 
Doubt wakes up when we strive for anything new or better. It recognizes that in moments when our ambition rises.
 
The only thing doubt can to do survive is take our strength by whining and singing its pessimistic song: I’m not sure, I’m not sure, I’m not sure.
 
“I’m not so sure it’s time to spend hard earned money to learn how to tattoo portraits.”
 
“maybe it’s not the right time to learn something I would Love.”
 
“She’ll probably say no if I ask her on a date.” 
 
“This course probably won’t work for me.”
 
I don’t think it’s s good idea to follow my passions or to strike out on my own.”
 
The precise moments when doubt begins to prevail in our lives are predictable.
 
They happen when our doubting thoughts turn into real words– the moment we begin asking, “what if…” And then follow the phrase with a negative statement:
 
What if..it doesn’t work out?
 
What if.. I can’t handle it?
 
What if.. I’m not good enough?
 
What if.. I ruin someone’s portrait?
 
What if.. They take advantage of me?
 
These are the questions of a mind poisoned by doubt not of our higher self.
 
It is the allowance and repetition of doubtful questions that stall most artists from reaching their full capability in their tattooing.
 
There can be no real progress if we question things negatively like this.
 
Yet the greatest damage from doubt isn’t just what we fail to do; it is who we fail to become.
 
We develop our tattooing only through effort, struggle, and learning, none of which we choose to invest in when doubt has our ear.
 
Doubt produces only Small artists, scared of their own shadows–a world full of Timid warriors who never leap or serve.
 
So what are we to do?
How does an artist slay doubt?
 
History has taught us that when doubt has a hold on us, only faith can tear us from its grasp.
 
Faith is a deep conviction, a global trust and confidence in our beliefs about what is true.
 
The conviction comes from choice– we choose to believe something and hold on to that belief tightly, even in the face of so many unknowns…
 
We have faith when we can endure failure, suffering, ruining a portrait, or loss and keep our wits about us, knowing that eventually these things shall pass and good things will return.
We have faith when we believe in our capabilities to succeed…
 
This belief doesn’t need to be overestimations of our current skill or strength. Instead, the most powerful faith in the world is the humble variety that says,
 
“I believe in my ability to learn and figure things out. With enough focus, time, effort, and dedication, I believe I can learn to do what must be done and become who I must become to achieve my dreams.”
 
If we carry on this kind of faith to learn and live into our potential, then doubt lies sweating on its deathbed.
stencil.instagram-post (3)
 
Today’s Action Step:
Comment Below all the reasons you have to believe in yourself and your ability to take your tattooing to the next level and master portraits.
 
Here’s 3 questions to answer:
1. What have we already done in life that we didn’t know we could?
 
2. What reason can we find to believe that this portrait course will get us on the path to success and be well worth the investment?
 
3. Why will we continue to believe in ourselves and our dreams even among difficulties?
 
Let us write these things. Let us force ourselves to do this seemingly simple activity now.
 
For in writing our beliefs, Faith itself is strengthened. Then the next time doubt rears its ugly head ( even in the middle of a tattoo) remember what was written… 
 
Remember what you believe. Replace its negative whining with more positive and empowering thoughts.
 
This is the way of those who have mastered their mind and reach their highest tattooing potential..
 
As we choose faith again and again throughout our lives, we develop a mental toughness for beating away doubt.
 
When we practice such power, it becomes something we can firmly grasp and use in times of need and anxiety while tattooing.
 
Soon, faith is our favored weapon and we become invincible against the darkness.
 
We become the warrior of light, who rarely questions themselves, who tattoos magnificently and progresses tremendously because they believe the universe favors those with a committed heart and all things are unfolding exactly as it should.
 

P.S. If You Skipped Through and scrolled down to the bottom of this blog post scroll right back up to the top and REREAD this So That You Can Answer the 3 questions if you’re serious about your tattooing, there’s some really important info here that can help improve your Confidence.

P.P.S.  I’m currently setting up my first webinar for all of my subscribers, I’ll let you know more about that soon.

Subscribe if you haven’t already, and Keep an Eye on your Inbox.

Bonus Video:

Click Here to Watch my Free Video of my 3 step system to Tattooing Portraits.


I look Forward to Reading Your posts Soon!

-Dax McClellan
Your Portrait Tattoo Mentor/Wizard

,

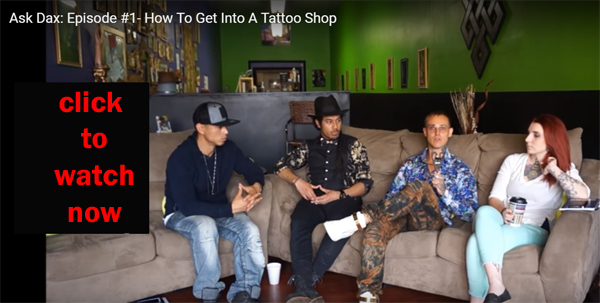
ASK DAX Episode 1: How To Get a Tattoo Apprenticeship… Tips to Get into a Shop

There’s Tons of Controversy about Apprenticeship and Tattooing, which is understandable.

Do You Tattoo in your house or Do You Get an Apprenticeship?

Personally only you can make your decision,

Here’s an article and a Bonus 45 Minute Video with Nuggets of Inspiration scattered throughout it that my team and I Created for you!

Apprenticeships usually teach valuable skills and practices for tattooing professionals. That’s been the “go to” way to learn how to become a Tattoo Artist and was the only way to get Education for ages.


But what about all of those horror stories about Apprenticeship FRAUDS??

You know, the Lazy Mentors, The Mentors that don’t lead by example, The Mentors that treat you like shit, The Mentors that treat you like a slave… I could go on and on… Bottom line their is Great shops you can find to Grow in.

Whether you get yourself in a situation that’s a good passionate shop or a shop that belittles you Its your responsibility to get in there.


Tattooing in a Professional Environment is the only way you’ll reach your full potential and gain Recognition and Respect.

So What Do we do? We Get in a Shop! 

I learned that personally…


If you’re serious about tattooing I want to help you get in a shop,

so In The Video Below We share ideas and personal insights from our experience, to help you gain momentum and find a shop to Grow in Kick up your feet and enjoy!

P.S.Share Your Story Below then.. I challenge you to Get in a Shop Today.

Leave a comment below the video with your experience…

One More Thing: This is the first episode of our BRAND NEW Q & A Show Where you Ask Questions and we Answer them!

If you want your questions to be featured on the Show send them here: [email protected] with Subject: ASK DAX

,

How To Tattoo Portraits Step-By-Step with my System

Ok! so today marks the 5th piece of Content for our FREE Series

BUT…

This isn’t where it ends!

below you have access to a free mini-tutorial video you can use to help bring clarity to the step by step process of doing a black and grey Portrait.

(finish reading this article and watch the video immediately!)

Maybe You’ve heard by now about what I call The Realistic Portrait System..

If so, cool this is a refresher and will crystallize your UNDERSTANDING.

If not..

Let me introduce you now:

It’s the simplest, most effective way to do black and grey portraits that I have found…

And it WORKS.

Not just for me but for many artists I’ve had the pleasure of coaching.

It’s a 3 step process.

and when you KNOW the process of something– that opens you up to something VERY valuable…

that brings CLARITY and CONFIDENCE.

because you know where to start, you know where you’re at, and you know where you’re going…

No more Spaghetti Tattooing this is a PROVEN SYSTEM.

Below is a Link to a Free Mini-Tutorial where I break down my system

P.S. check your email from me on: March 31st Thursday 8AM 

Realistic Portrait System Video:

Click Here to Watch The Video


,

Things to Consider when Tattooing Portraits… Tattoo Portrait Tips

Tattoo Shading is an exceedingly precise yet optimal task when it comes to Black and Grey…

black and grey is not a Style where one thing will work for everyone.

Here are some ideas you may find useful when doing Black and Grey:


#1 Some of the important aspects are clients skin tone and their skin types.

when tattooing darker skin you don’t really have the option to go in with half tones and those really really light tones, but that doesn’t mean you can’t do a nice tattoo!

I recommend creating a pallette of darker tones for darker skin clients, and I eliminate some of the lighter tones that I know won’t show up.


#2 Darker skin tends to swell more and look shinier than lighter skin..

the swelling may cause confusion as to what ink is sticking and what isn’t… Trust your process, Don’t make the rookie mistake of grinding over and over on the skin.

Trust the Process don’t overdo the process.


#3 The Concentration of the ink will determine the shading effect..

The best thing I recommend for consistent shading is to get a Greywash Set..

some of you may still be doing that whole old-school mixing your own crap… please stop!

Tattooing is about Consistency, and Systems. When you have a consistent greywash you are eliminating the guesswork of which tone will come out of that cup. 

NO BRAINER. 

What works best for me right now is Ron Meyers Greywash

Rinse your tube thoroughly when using a darker shade of ink and going to a lighter, or else you’d end up spitting a bit of darkness into your lighter tones.

 Build your self-awareness on which tone is in which cup.

 Confused about which tones is in which cup of greywash?

I used to too, especially when trying out different brands and I found a Solution…

The 2 Drop Technique.

This Technique clears that confusion of what tone will come out of what cup…

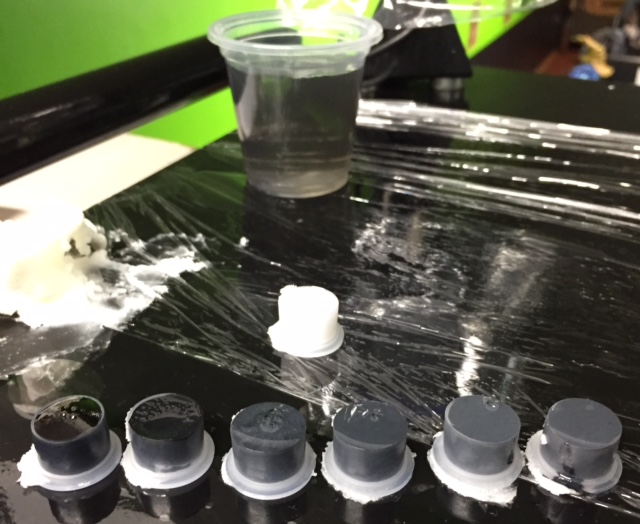
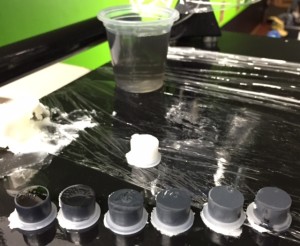
For sophisticated creamy looking blends you might want to consider the 2 Drop Technique which is basically adding 2 drops of white ink into diluted greywashes.

*See exactly how to do it Here and the Benefits: The 2 Drop Technique


#4 The Depth of the needles is to be handled carefully when shading..

(Note: this applies to rotaries mostly NOT coil machines.. I believe Coils are never as reliable and consistent as rotaries and they both have a different way of approaching tattooing the stretching the skin might apply on coils but its mostly for using rotaries)

For Solid blacks go in a bit deeper and you can also tighten the skin more.

Stretching the skin while tattooing would give you a darker tone when once released.

When going for softer shading you will go in less deep and/or hold the skin less tight..

This is something you’ll learn through experience and adapt to when tattooing you’ll get a “feel” if an area needs more or less pressure.

If you’re wondering what type of machine I use currently I use a Spektra rotary

you can see what they are all about right through this link

Needle groupings are also very essential for the blends and play a big role for soft blends. Larger the magnum amounts to greater smoothing when used correctly..I prefer Curved Magnums.

Now with my Spektra if you’re wondering what needles I use

I prefer to use Ego Grips and Cheyenne Hawk Cartridges which can be ordered through my main supplier here.

Keep Reading…

10374472_10200909705783438_5697559106354678533_n


#5 Hand Angle is Very important when it come for softer shading effects.

A slightly tilted positioning of your hand let’s say 45 degree, may alter the blends very neatly and impart a gorgeous faded look..

Keep your hand and frequency in accordance to the machines hand and frequency for perfect tattoo filling and designs. This Comes with practice you will get the “feel”…

One More Thing:

In the Comment Section Below Let Me know what supplies YOU use and any tips you think should be included in this post.

Thanks So much I look forward to reading EVERY SINGLE ONE.

if you’re looking to build your Confidence with Portraits Check out the Free Bonus Mini-Tutorial in the Link Below:

Bonus Mini-Tutorial: The Realistic Portrait System Video


[activecampaign]
,

How To Tattoo Black And Grey Portraits: Quick Tips for the Professional

Are you frustrated by black and grey portrait tattoos?

This article is going to help you grasp the basics of tattooing a black and grey portraits:

First Off, if you want to create three-dimensional realistic portraits There’s a few things you should know.

Portraits are to be taken seriously, if you don’t know how to use the tools in your hands DON’T ATTEMPT ONE!!

black and grey shading helps you create stunning details in your tattoos and you’ll need to know how to shade properly if you want to tattoo portraits.

If you’re looking for Tips on shading I HIGHLY RECOMMEND Testing out my

 2 Drop Technique  if you haven’t already.

Ironically,

black and grey portraits are one of the WORST looking tattoos if done improperly. 

So you really have to master the art and learn the process before you get to a serious attempt.

Keep Reading…

Here’s a Few tips on how I tattoo all of my black and grey portraits:


1- First Things First-

use a good reference and make a good stencil, the stencil is like the “framing” to a house,

make sure to build a strong foundation if you want to do an exceptional portrait.

All your results in Life and Tattooing amount to your actions,

the steps you take to prepare for a portrait determines what you get out of one. there are no shortcuts.

Have Supreme Confidence with the process.

*If you are lacking confidence or unclear about the process of a portrait:

Check out the Free Bonus Mini-Tutorial at the bottom of the page about the Realistic Portrait System. 


2- Use a stencil solution.

If you’re still using green soap smack yourself! there’s benefits to stencil solutions..

Stencil solutions are consistent and they stick WAY LONGER than green soap or any of that old-school stuff.

I like to use Electrum Stencil Primer for my stencils and it takes a HUGE weight off my shoulders when tattooing portraits because i don’t have to worry about the stencil wiping away.


3- Put a reference picture next to the skin.

This might sound like it doesn’t matter but believe me, there’s a MAJOR relief on your brain and eyes when you shorten the length from your reference pic to your tattoo..

ever seen mis-proportioned portraits?

they might be because of how they set up their reference picture..

when your reference is right next to skin you can reference proper angles, shades, shadows, I could go on and on…

It’s these small things that make the BIG difference. 

The easier you make doing a portrait on your brain the more energy you’ll have to focus on the technical skills of needle to skin.

Start from the bottom right and break your portrait into specific areas.

If you start from the top, chances are you are going to wipe away the stencil while you move your hand down in strokes. Common Sense I know but common sense isn’t so common these days..  


4- DO NOT start with lining.

that is unless you want your portrait to look like a robot..

robots have lines in them, not human faces lol…

instead,

focused more on shading specific areas.. sculpting them.

Start with the lights and go dark.

and then after the shading is done go back with a smaller needle to tighten up some of the small details.

*If you want to know more about the process and my step-by-step system make sure to download the BONUS VIDEO at the bottom of the page.


5- Needle Tips.

In my opinion, the best tattoo needle for a black and grey portrait is a curve magnum needle. 

The curve magnum tattoo needle allows you to shade in areas softly and the key to doing a portrait is soft, feathery strokes. 

At the very end, when all areas are shaded in, you may want to use a small round liner to outline on the darkest shaded areas to give the portrait additional definition.

6- Greywash Tips-

In black and grey portraits when using grey washes when they are freshly done they tend to look a little darker than when they are healed. So realistically there should be no skin tone in a realistic portrait.

*For More Greywash Tips Check out this Post: Black and Grey Shading Techniques

Shadow and Highlighting Tips-

Always pay attention to where the light source is coming from and where the shadows are being reflected.

Put a little bit of white where the light source is coming from and then put a little bit of shadow opposite to that.

Use the white sparingly in your portrait tattoo.

Using too much white will make your tattoo lose dimension and look less realistic.


If you want to take your tattoo skills to the next level Check out the Bonus Video Below:

FREE BONUS DOWNLOAD: The Realistic Portrait System Mini-Tutorial Video

,

How To Shade Consistent Greywash Tones…

One of the BIGGEST struggles I hear about from artists and my students is getting the right tones and values in their black and grey tattoos..

I know the struggle..

All of the tones in the caps look the same…!

and yea, we can just dip and guess.

but…

What if we could see the tones that are going in the skin, in the ink cup…?

That would help us with becoming more confident in what tone we put into the skin right…?

There is a way…(Keep Reading)

3

The 2 Drop Technique does just that! (click the blue link to see what its about)

Less guesswork, resulting in MORE CLARITY and MORE CONFIDENCE with our black and grey tattoo portraits!

IMPORTANT: the 2 drop technique isn’t a “magic pill” you may still need to test and learn how to mix between all of the tones to achieve smooth transitions..

I recommend experimenting with this for a FULL 30 days to get the FULL EFFECT!

there is no shortcut here unfortunately.

My best advice when learning how to use greywash is to

Invest into a pre-made set and use the 2 Drop Technique.

Why?

because consistency is key to tattooing..

and consistency in your washes means you you can rely on your greywash and build GOOD HABITS.

when you understand the tones in each cup it makes it a lot more clear in achieving certain tones from your reference pictures and transitioning those tones!

Fuck the Guesswork! lol

and please don’t be one of those goons that only uses just the tones in the caps,

it’s Natural, in fact its good,to dip between greywash caps in order to get a certain tone..

just make sure to be aware of what tone you have in your cap before dipping into the others..

for example,

it’d be plain STUPID to dip from black or darkest grey, into your lightest because it’ll change your lighter wash into a darker wash…

the key is to bring your awareness into how you use your greywash in the moment. Start to pay attention to what you’re doing and if you do end up with darker tones in your needle, make sure to rinse your needle off in your rinse cup before dipping into the light wash again.

one more thing, 

if you’re new to greywash all around, start off with shading a small area of the skin with your lightest, and test out the tones in each cap from light to dark to build your comfort.

Leave A Comment Below letting me know how this works for you

and if you like this post SHARE it, Thanks so much!

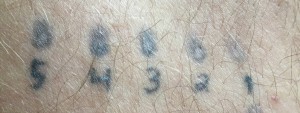
(p.s. I did this on myself when first testing greywashes, here’s a pic below, and yes I still have this tattoo on my leg lol.)

FREE BONUS MINI-TUTORIAL: How to Tattoo a Portrait Using my Step-By-Step System FullSizeRender (20)


[activecampaign]
,

How I Improved my Black and Grey Shading with The 2 Drop Technique

I use to Struggle with shading smooth Black and Grey work..

Sometimes my tattoos came out decent, but I couldn’t do consistently smooth pieces,

and that effected my confidence.

That was until I Discovered the 2-Drop Technique.

The 2-Drop Technique isn’t a specific shade, and it doesn’t require a certain tattoo machine, needle, or anything like that.

It’s just a quick modification to your Greywash that improves the smoothness in your shading and gives your tattoos a “silky smooth” look..

2 drop technique

This Is How it’s Done:


Just add 2 drops of white into each one of your caps of greywash.

Whether you make your own greywash or you purchase pre-made sets. Try it out!

Below is a Picture of what it looks like:

2 Drop Technique

Here Are The Benefits

I noticed 3 things happening:

1Tones more consistent – I’ve noticed Less Redness and the irritation goes down quickly.

2- Shading will be Smoother and Softer – When there’s less redness I saw truer tones.

3Confidence with Shading Improved – I became more comfortable with my Black and Grey work.

*Final Tip:

put the greywash in the caps first.. then do the 2 drops,

after that make sure to take the time to mix them nicely.

I use the needle on my machine and I mix them in order from light to Dark,

that way they stay consistent.

Remember: You may notice a difference right from the start using this technique,

but I believe that you really won’t get the full effect until you give it 30 days of experimenting with in your black and grey tattoos. Try it for 30 days and Let me know how it goes:)

Ok so now that you know the “2 Drop Technique”

here’s what I want you to do:

Are you currently struggling to Shade smoothly? Are you confused about  how to do consistent black and grey? Do you have any questions about black and grey portraits?

Leave a comment right here and I’ll do my best to address it.

Bonus Download: Free Portrait Mini-Tutorial


[activecampaign]
,

Introducing B & G Portraits 101 a Free 5 part content series..

I’ve been quietly working on a HUGE project and today is the day I tell you about it.

Smart tattoo artists who want to learn and attempt black and grey portraits must UNDERSTAND how to shade smoothly, know how to use greywash, and know the entire process from start to finish in order to create a successful portrait instead of a ruined one.

Well that’s where B & G Portraits 101- a free content series comes in..

Are you as excited as I am?

Share your thoughts in the comments

If you’re not on the mailing list yet enter your email below and press submit!

[activecampaign]